前言
不知各位朋友现在在web端进行登录的时候有没有注意一个变化,以前登录的时候是直接账号密码通过就可以直接登录,再后来图形验证码,数字结果运算验证,到现在的拼图验证。这一系列的转变都是为了防止机器操作,但对于我们来说,有亿点麻烦,但也没办法呀。
今天我们也一起来做一个制造亿点麻烦的人,实现一个拼图验证。
实现原理
这个实现原理并不复杂,我们只需要一张图作为我们的拼接素材,我们再单独弄一个盒子,然后移动它,到我们的指定位置,到达指定范围内即验证通过,反之验证未通过。
既然原理我们知道了,那我们就开干吧。
实现前端登录拼图验证
本篇文章以 css 为主, javascript为辅实现。
搭建框架
我们要实现这个功能,我们需要先搭建出来一个框架。
1
2
3
4
5
6
7
8
9
10
11
12
13
14
15
16
17
|
// css

<style>
    .check{
            width: 400px;
            height: 300px;
            background-repeat: no-repeat;
            background-size: 100% 100%;
            background-image: url(https://img0.baidu.com/it/u=2028084904,3939052004&fm=253&fmt=auto&app=138&f=JPEG?w=889&h=500);
        }
</style>

// html

<div class="check"></div>
|
我们画出来后,它就长下面图这样。

添加被校验区域及校验区域
我们需要添加一个被校验的区域及校验区域,用来做我们的校验,像下图这两个东西。
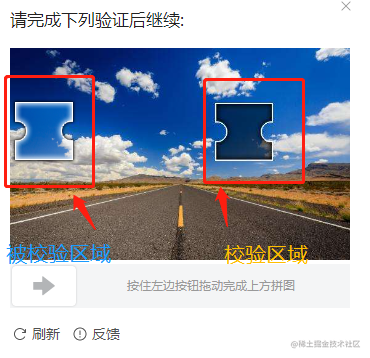
这里我们使用伪类来实现这两个区域。
校验区域
1
2
3
4
5
6
7
8
9
10
| .check::before{
content: '';
width: 50px;
height: 50px;
background: rgba(0, 0, 0, 0.5);
border: 1px solid #fff;
position: absolute;
top: 100px;
left: 280px;
}
|
这样一个校验区域就做好了。
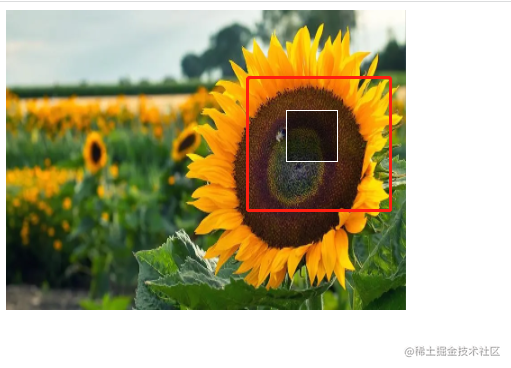
被校验区域
这里我们需要使用到background-position根据我们的校验区域大小进行切出我们的被校验区域。
background-image和background-repeat我们直接继承,background-position设置为校验区域的坐标位置(也就是距离top和left的距离),我们将background-size图片大小设为原盒子的大小。这样我们就得到了校验区域的那一片区域,也就是我们的被校验区域了。
1
2
3
4
5
6
7
8
9
10
11
12
13
14
15
16
17
18
| .check-child{
content: '';
width: 50px;
height: 50px;
border: 1px solid #fff;
background-image: inherit;
background-repeat: inherit;
background-size: 400px 300px;
background-position: -280px -100px;
position: absolute;
top: 100px;
left: 10px;
}
// html
<!-- 被校验区域 -->
<div class="check-child"></div>
|
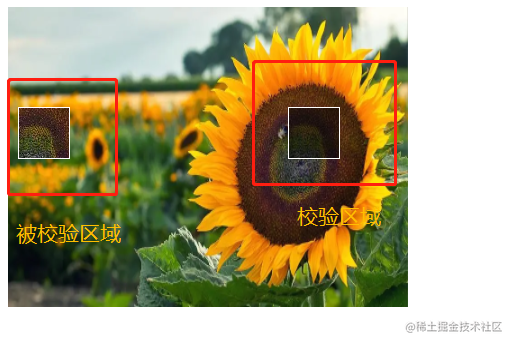
添加拖动条
这里我们两个区域都添加完了,我们需要添加一个拖动条。
我们先添加一个拖动区域。
1
2
3
4
5
6
7
8
9
10
11
| // css
.drag{
width: 400px;
height: 50px;
background-color: #e3e3e3;
margin-top: 10px;
position: relative;
}
// html
<div class="drag"></div>
|
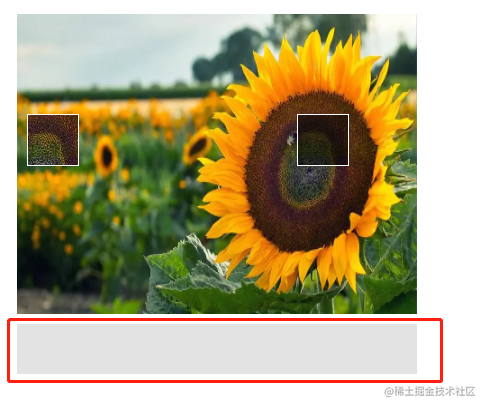
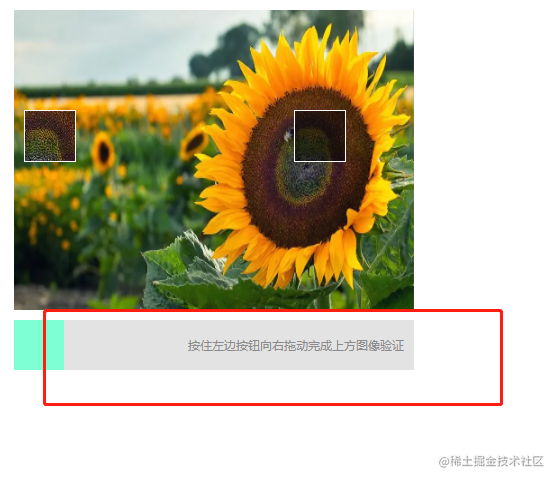
现在拖动区域有了,我们需要在拖动区域内添加一个可拖动的盒子,及操作说明,不然看起来交互效果不友好。
添加可拖动的盒子及交互说明
我们添加一个可以拖动的盒子。
1
2
3
4
5
6
7
8
9
10
11
12
13
14
15
16
| // css
.drag-child{
width: 50px;
height: 50px;
background-color: aquamarine;
z-index: 10;
position: absolute;
top: 0;
left: 0;
}
// html
<div class="drag-child"></div>
|
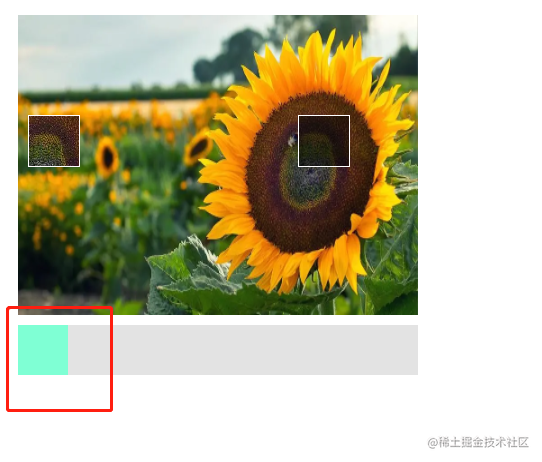
为了我们友好的交互,我们在拖动区域内给他添加操作说明。
1
2
3
4
5
6
7
8
9
10
11
12
13
14
15
16
17
18
19
| // css
.drag-tips{
display: flex;
align-items: center;
justify-content: end;
width: 95%;
height: 100%;
margin: 0 auto;
font-size: 12px;
color: #8a8a8a;
}
// html
<div class="drag-tips">
<span>按住左边按钮向右拖动完成上方图像验证</span>
</div>
|
拖动条动起来
这一步我们需要让我们的拖动盒子动起来,让他可以在拖动区域内随意的左右拖动。
1
2
3
4
5
6
7
8
9
10
11
12
13
14
15
16
17
18
19
20
21
22
23
24
25
26
27
28
|
const drag = document.querySelector('.drag-child')
const dragMouseDown = event => {
document.addEventListener('mousemove', dragMouseMove)
}
const dragMouseMove = event => {
const { offsetX } = event
if(offsetX < 0 || offsetX > 350){
return
}
drag.style.transform = `translateX(${offsetX}px)`
}
const dragMouseUP = event => {
document.removeEventListener('mousemove', dragMouseMove)
}
document.addEventListener('mousedown', dragMouseDown)
document.addEventListener('mouseup', dragMouseUP)
|
现在我们的盒子就可以正常的拖动了,但现在它还有几个问题,我们后面来解决。
- 提示文字会被选中;
- 在
拖动区域内拖动会闪烁;
联动被校验区域
我们先让被校验区域跟着我们的拖动动起来。
1
2
3
4
5
|
const check = document.querySelector('.check-child')
check.style.left = `${offsetX}px`
|
这样我们的被校验区域就能够跟着动了,我们声明一个方法用来表示,通过校验的回调。
1
2
3
4
5
6
7
8
9
10
11
12
13
14
15
16
17
18
19
20
21
22
23
|
const success = () => {
console.log('通过校验');
}
const dragMouseMove = event => {
const { offsetX } = event
if(offsetX < 0 || offsetX > 350){
return
}
drag.style.transform = `translateX(${offsetX}px)`
check.style.transform = `translateX(${offsetX}px)`
if(offsetX >= 278 && offsetX <= 285){
success()
}
}
|
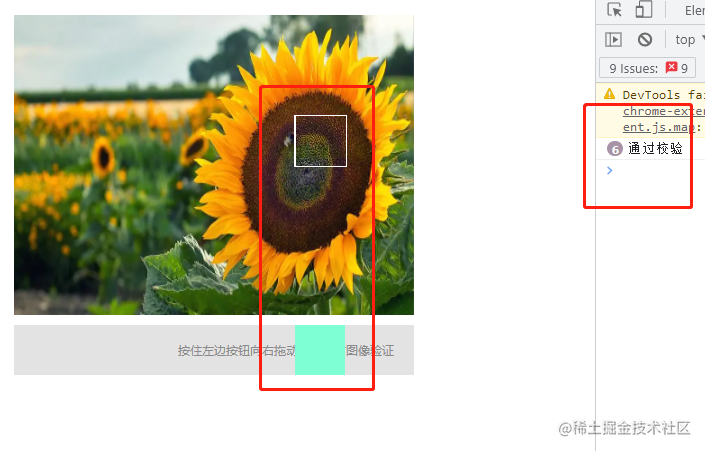
添加交互动画
这里我们在鼠标移出监听的时候添加一个动画,当当前未通过校验的时候我们给他还原到初始位置。
1
2
3
4
5
| @keyframes move {
to {
transform: translateX(0);
}
}
|
1
2
3
4
5
6
7
8
9
10
11
12
13
14
15
16
17
18
19
20
21
22
23
24
25
26
27
28
29
30
31
|
const dragMouseUP = event => {
document.removeEventListener('mousemove', dragMouseMove)
const { offsetX } = event
if(offsetX < 278 || offsetX > 285){
drag.style.animation = 'move 0.5s ease-in-out'
check.style.animation = 'move 0.5s ease-in-out'
const animationEnd = ()=>{
drag.style.transform = `translateX(${0}px)`
check.style.transform = `translateX(${0}px)`
drag.style.animation = ''
check.style.animation = ''
document.removeEventListener("animationend", animationEnd)
}
document.addEventListener("animationend", animationEnd)
}
}
|
当我们未通过校验,且放开鼠标的时候,它就会自动回到初始位置。
解决遗留问题
1、 提示文字会被选中
我们在提示文字的样式中添加user-select: none;,禁用掉文字选择。
1
2
3
4
5
6
7
8
9
10
11
12
13
14
15
16
17
18
|
.drag-tips{
display: flex;
align-items: center;
justify-content: end;
width: 95%;
height: 100%;
margin: 0 auto;
font-size: 12px;
color: #8a8a8a;
user-select: none;
z-index: 1;
position: absolute;
top: 0;
left: 0;
}
|
2、 在拖动区域内拖动会闪烁
我们将我们刚刚使用的offsetX改为pageX。这里需要注意一下边距偏移量的问题哦。
1
2
3
4
5
6
7
8
9
10
11
12
13
14
15
16
17
18
19
20
21
22
23
24
25
26
27
28
29
30
31
32
33
34
35
36
37
38
39
40
41
42
43
44
45
46
47
48
49
50
|
const dragMouseMove = event => {
console.log(event);
const { pageX } = event
if(pageX < 0 || pageX > 350){
return
}
drag.style.transform = `translateX(${pageX}px)`
check.style.transform = `translateX(${pageX}px)`
if(pageX >= 278 && pageX <= 285){
success()
}
}
const dragMouseUP = event => {
document.removeEventListener('mousemove', dragMouseMove)
const { pageX } = event
if(pageX < 278 || pageX > 285){
drag.style.animation = 'move 0.5s ease-in-out'
check.style.animation = 'move 0.5s ease-in-out'
const animationEnd = ()=>{
drag.style.transform = `translateX(${0}px)`
check.style.transform = `translateX(${0}px)`
drag.style.animation = ''
check.style.animation = ''
document.removeEventListener("animationend", animationEnd)
}
document.addEventListener("animationend", animationEnd)
}
}
|
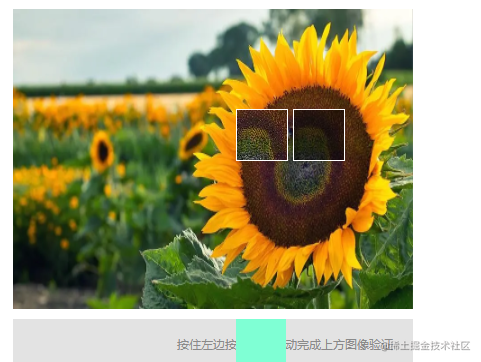
效果图
我们看一下效果图。
完整代码
1
2
3
4
5
6
7
8
9
10
11
12
13
14
15
16
17
18
19
20
21
22
23
24
25
26
27
28
29
30
31
32
33
34
35
36
37
38
39
40
41
42
43
44
45
46
47
48
49
50
51
52
53
54
55
56
57
58
59
60
61
62
63
64
65
66
67
68
69
70
71
72
73
74
75
76
77
78
79
80
81
82
83
84
85
86
87
88
89
90
91
92
93
94
95
96
97
98
99
100
101
102
103
104
105
106
107
108
109
110
111
112
113
114
115
116
117
118
119
120
121
122
123
124
125
126
127
128
129
130
131
132
133
134
135
136
137
138
139
140
141
142
143
144
145
146
147
148
149
150
151
152
153
154
155
156
157
158
159
160
161
162
163
164
165
166
167
168
169
170
171
172
173
174
175
176
177
178
179
180
181
182
183
184
185
| <!DOCTYPE html>
<html lang="en">
<head>
<meta charset="UTF-8">
<meta http-equiv="X-UA-Compatible" content="IE=edge">
<meta name="viewport" content="width=device-width, initial-scale=1.0">
<title>drag</title>
<style>
*{
margin: 0;
padding: 0;
}
body{
padding: 20px;
}
.check{
width: 400px;
height: 300px;
background-repeat: no-repeat;
background-size: 100% 100%;
background-image: url(https://img0.baidu.com/it/u=2028084904,3939052004&fm=253&fmt=auto&app=138&f=JPEG?w=889&h=500);
position: relative;
}
.check::before{
        content: '';
        width: 50px;
        height: 50px;
        background: rgba(0, 0, 0, 0.5);
        border: 1px solid #fff;
        position: absolute;
        top: 100px;
        left: 280px;
}
.check-child{
content: '';
width: 50px;
height: 50px;
border: 1px solid #fff;
background-image: inherit;
background-repeat: inherit;
background-size: 400px 300px;
background-position: -280px -100px;
position: absolute;
top: 100px;
left: 0;
}
.drag{
width: 400px;
height: 50px;
background-color: #e3e3e3;
margin-top: 10px;
position: relative;
}
.drag-child{
width: 50px;
height: 50px;
background-color: aquamarine;
z-index: 10;
position: absolute;
top: 0;
left: 0;
}
.drag-tips{
display: flex;
align-items: center;
justify-content: end;
width: 95%;
height: 100%;
margin: 0 auto;
font-size: 12px;
color: #8a8a8a;
user-select: none;
z-index: 1;
position: absolute;
top: 0;
left: 0;
}
@keyframes move {
    to {
        transform: translateX(0);
    }
}
</style>
</head>
<body>
<div class="check">
<div class="check-child"></div>
</div>
<div class="drag">
<div class="drag-tips">
<span>按住左边按钮向右拖动完成上方图像验证</span>
</div>
<div class="drag-child"></div>
</div>
</body>
<script>
const drag = document.querySelector('.drag-child')
const check = document.querySelector('.check-child')
const success = () => {
console.log('通过校验');
}
const dragMouseDown = event => {
document.addEventListener('mousemove', dragMouseMove)
}
const dragMouseMove = event => {
const { pageX } = event
if(pageX < 0 || pageX > 350){
return
}
drag.style.transform = `translateX(${pageX}px)`
check.style.transform = `translateX(${pageX}px)`
if(pageX >= 278 && pageX <= 285){
success()
}
}
const dragMouseUP = event => {
document.removeEventListener('mousemove', dragMouseMove)
const { pageX } = event
if(pageX < 278 || pageX > 285){
drag.style.animation = 'move 0.5s ease-in-out'
check.style.animation = 'move 0.5s ease-in-out'
const animationEnd = ()=>{
drag.style.transform = `translateX(${0}px)`
check.style.transform = `translateX(${0}px)`
drag.style.animation = ''
check.style.animation = ''
document.removeEventListener("animationend", animationEnd)
}
document.addEventListener("animationend", animationEnd)
}
}
document.addEventListener('mousedown', dragMouseDown)
document.addEventListener('mouseup', dragMouseUP)
</script>
</html>
|
最后
本篇前端实现登录拼图验证就到此结束了,这个功能一般都是在登录的时候用的。本篇文章的案例可以正常使用。
本篇实现的代码中存在一个遗留问题,非拖动区域内能拖动。
